How I Do Paper Cuts

I’m back making paper cuts/art/crafts
(I can never decide or be consistent with what I want to call them).
I find paper crafts very soothing to do and a great accompaniment to a podcast or a YouTube video, especially now the evenings are getting longer and there’s more time to make in the day-light.
I can usually create what I have in my imagination quite quickly, usually in one sitting, which is a nice contrast to puppet and theatre-making which usually takes a lot longer to do. I also didn’t realise that making paper cuts makes a brilliant and gentle winding down exercise at the end of the day.
I’ve had the idea of making paper crafted homages to famous dogs in history for years, and until now, never got round to it.
I decided for my first dog, I wanted to make a little tribute to Laika, one of the first animals to be shot out into space to test the potential of space travel. I’ve been fascinated by Laika for years and made a pretty rubbish puppet of her a while back (Maybe I’ll make another one to redeem myself). I think she was a good dog.
But along with Laika I wanted to also make a paper cut Ham. Not a food ham, but Ham the chimpanzee who was sent, just like Laika, into space. I see them both as pioneers, one from the Soviet Union, one from the United States, one that didn’t come back and one who lived the end of their days on Earth.
They also represent my passion for dogs and a dear friend’s fascination with chimps and our joint interest in nature and animals. So I suppose it’s a tribute to that too!

As well as sharing this piece, I wanted to also share how I go about making paper cuts. Over the last year (with more time to just sit and make due to COVID) it has become quite a streamlined process that has a gentle familiarity to it.
Firstly, I have to manhandle my A3 adjustable drawing board from Hobby Craft out of the the Kalax unit. It saves my back from being sore, so I can make for longer. I also pop a big cutting mat underneath.
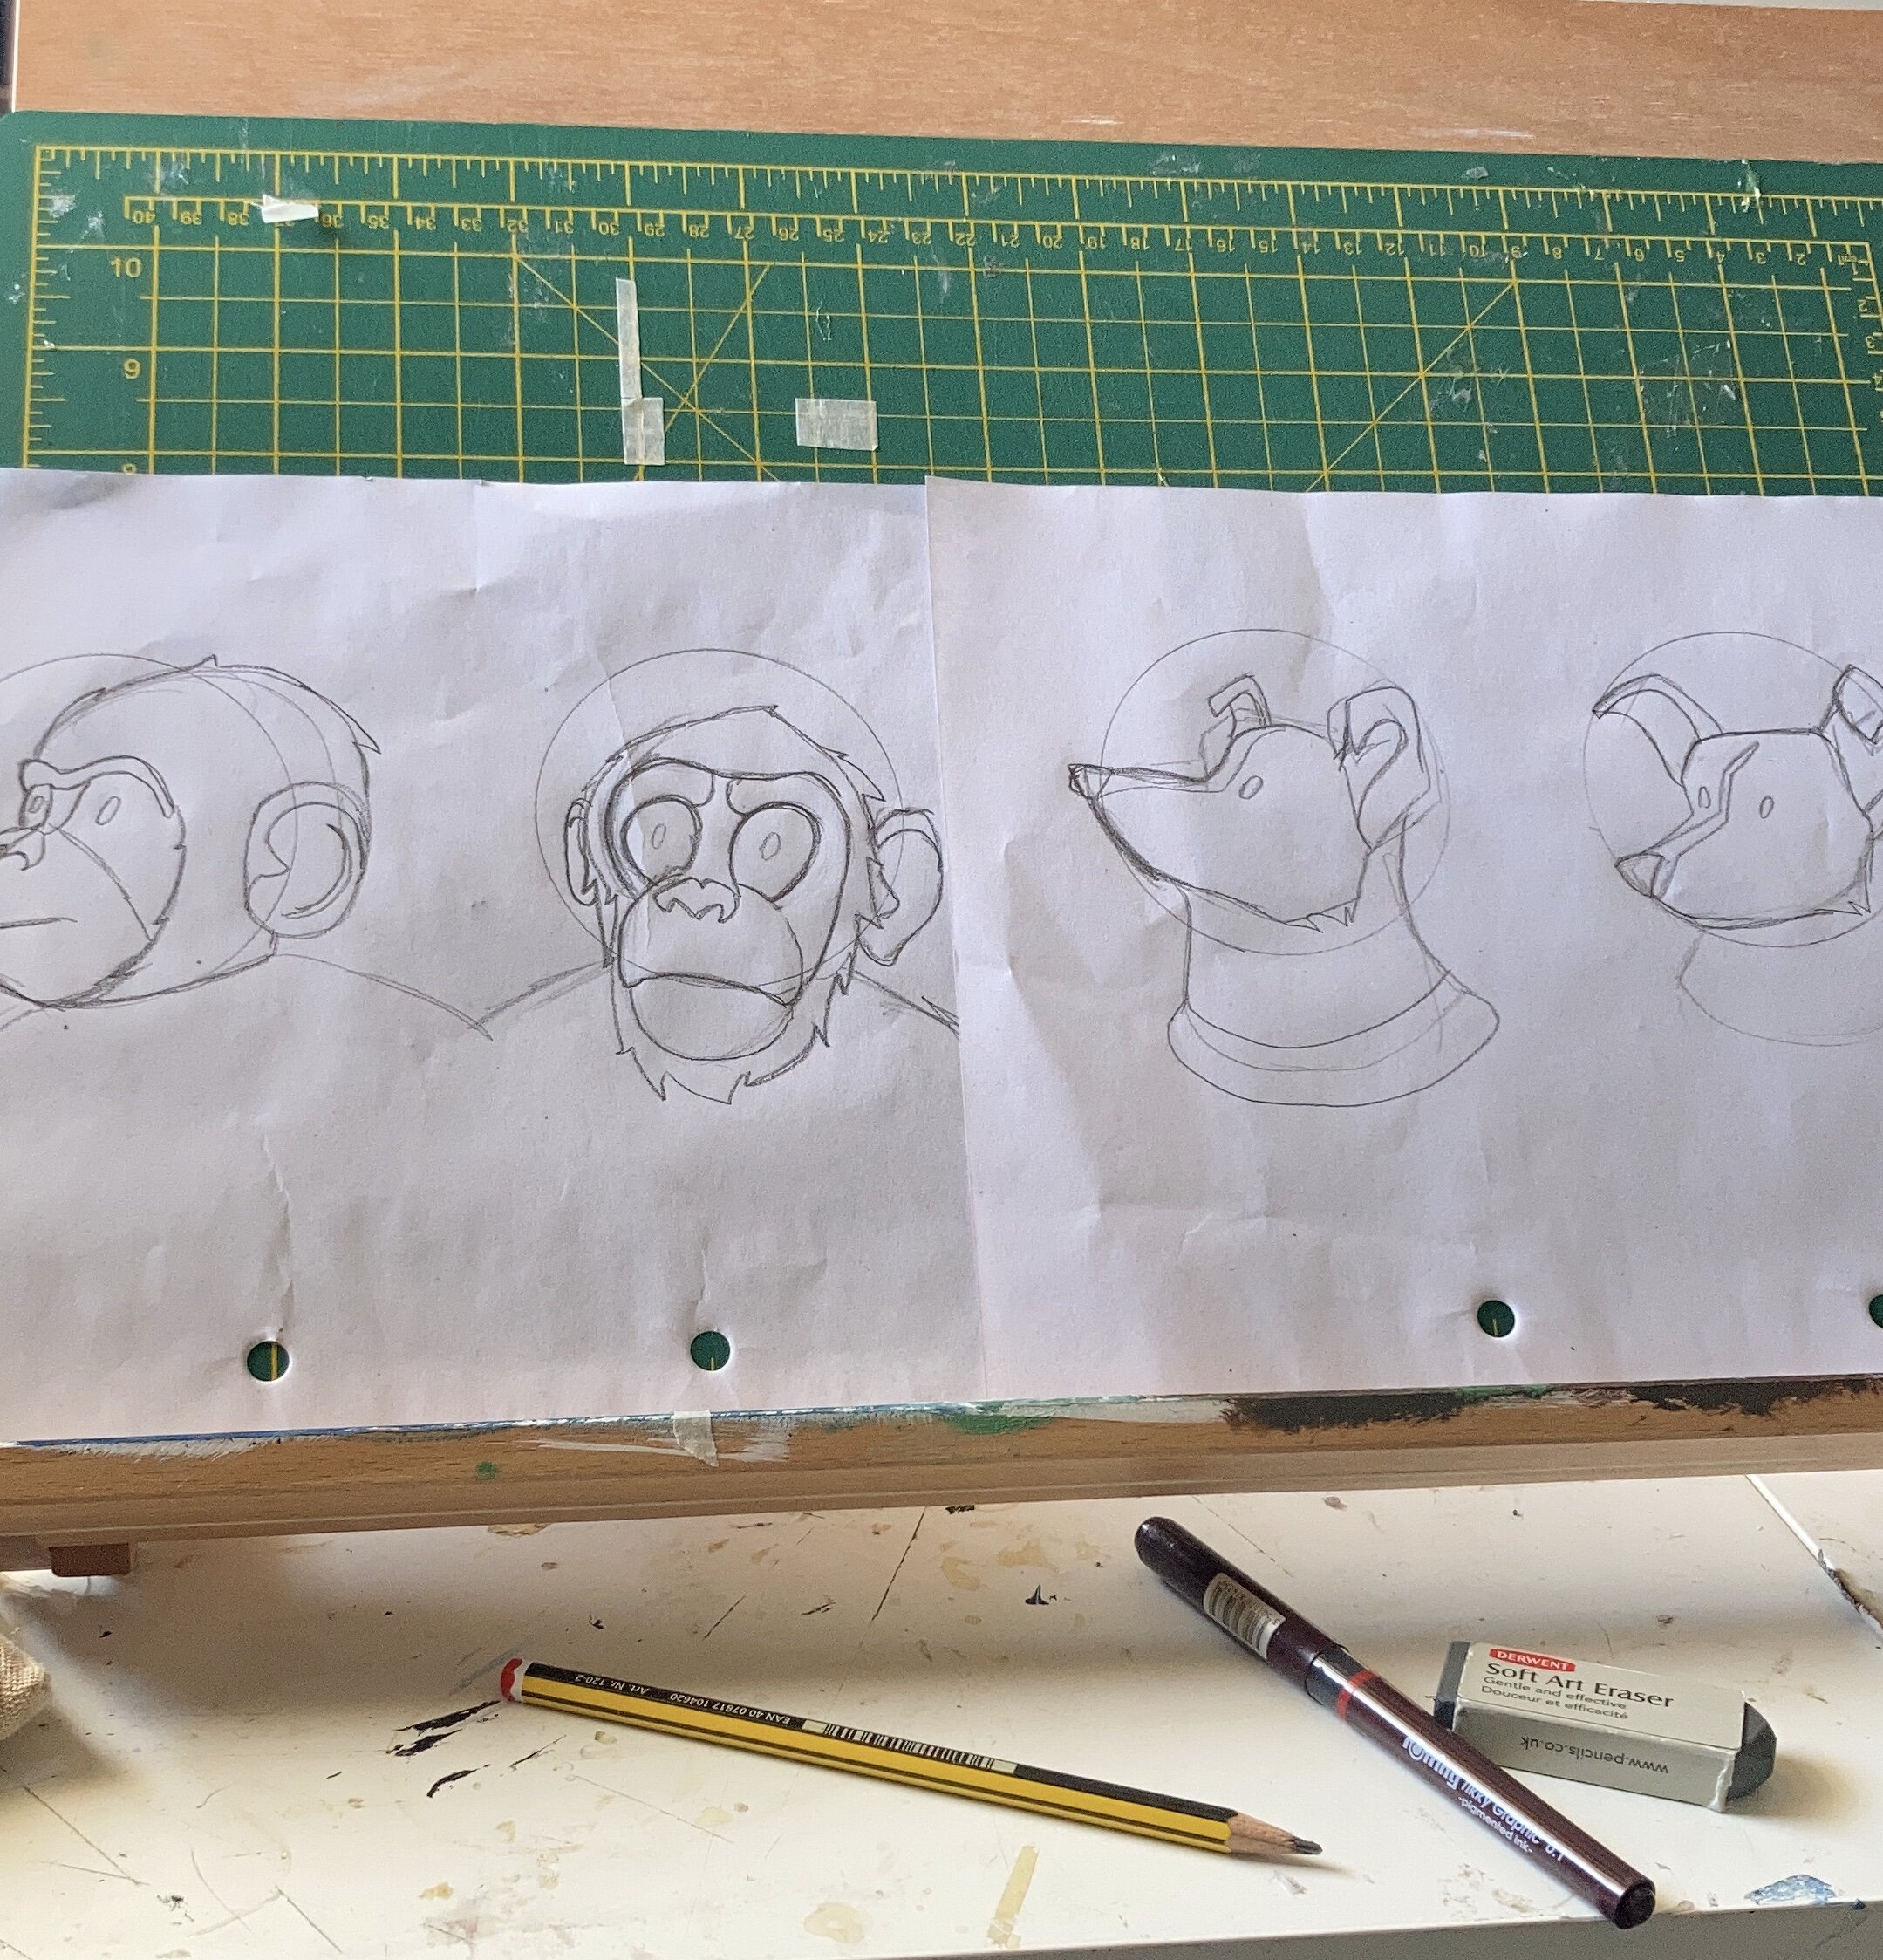
I start off by sketching my idea. If I’m not sure of pose, I tend to play about with some thumbnails - little sketches that help get an idea of composition, pose and gesture. I decided to try out two different angles as I wasn’t sure which ones would work for the tone of the piece I had in my head. In the end i decided to give them both a go.
I also use a lot of reference. I used to think most artist could just draw freehand whatever they dreamt up. And then I realised every artist used references and not to be too hard on myself. It greatly improved my art! I usually use Unsplash, which has a lot of high quality, royalty free photos on it but for this paper cut I used photos of the real Ham and Laika that I found in a Google image search.
Even at this stage, I am already figuring out how each part of of the face will be a different layer of card and what colours those card could be (or at least what will be lighter and darker). I think trying to conceptualise each facial feature on its own layer has drastically improved my drawing skill by helping me break down a reference photo into simpler shapes.

I can’t get over his existential dread.
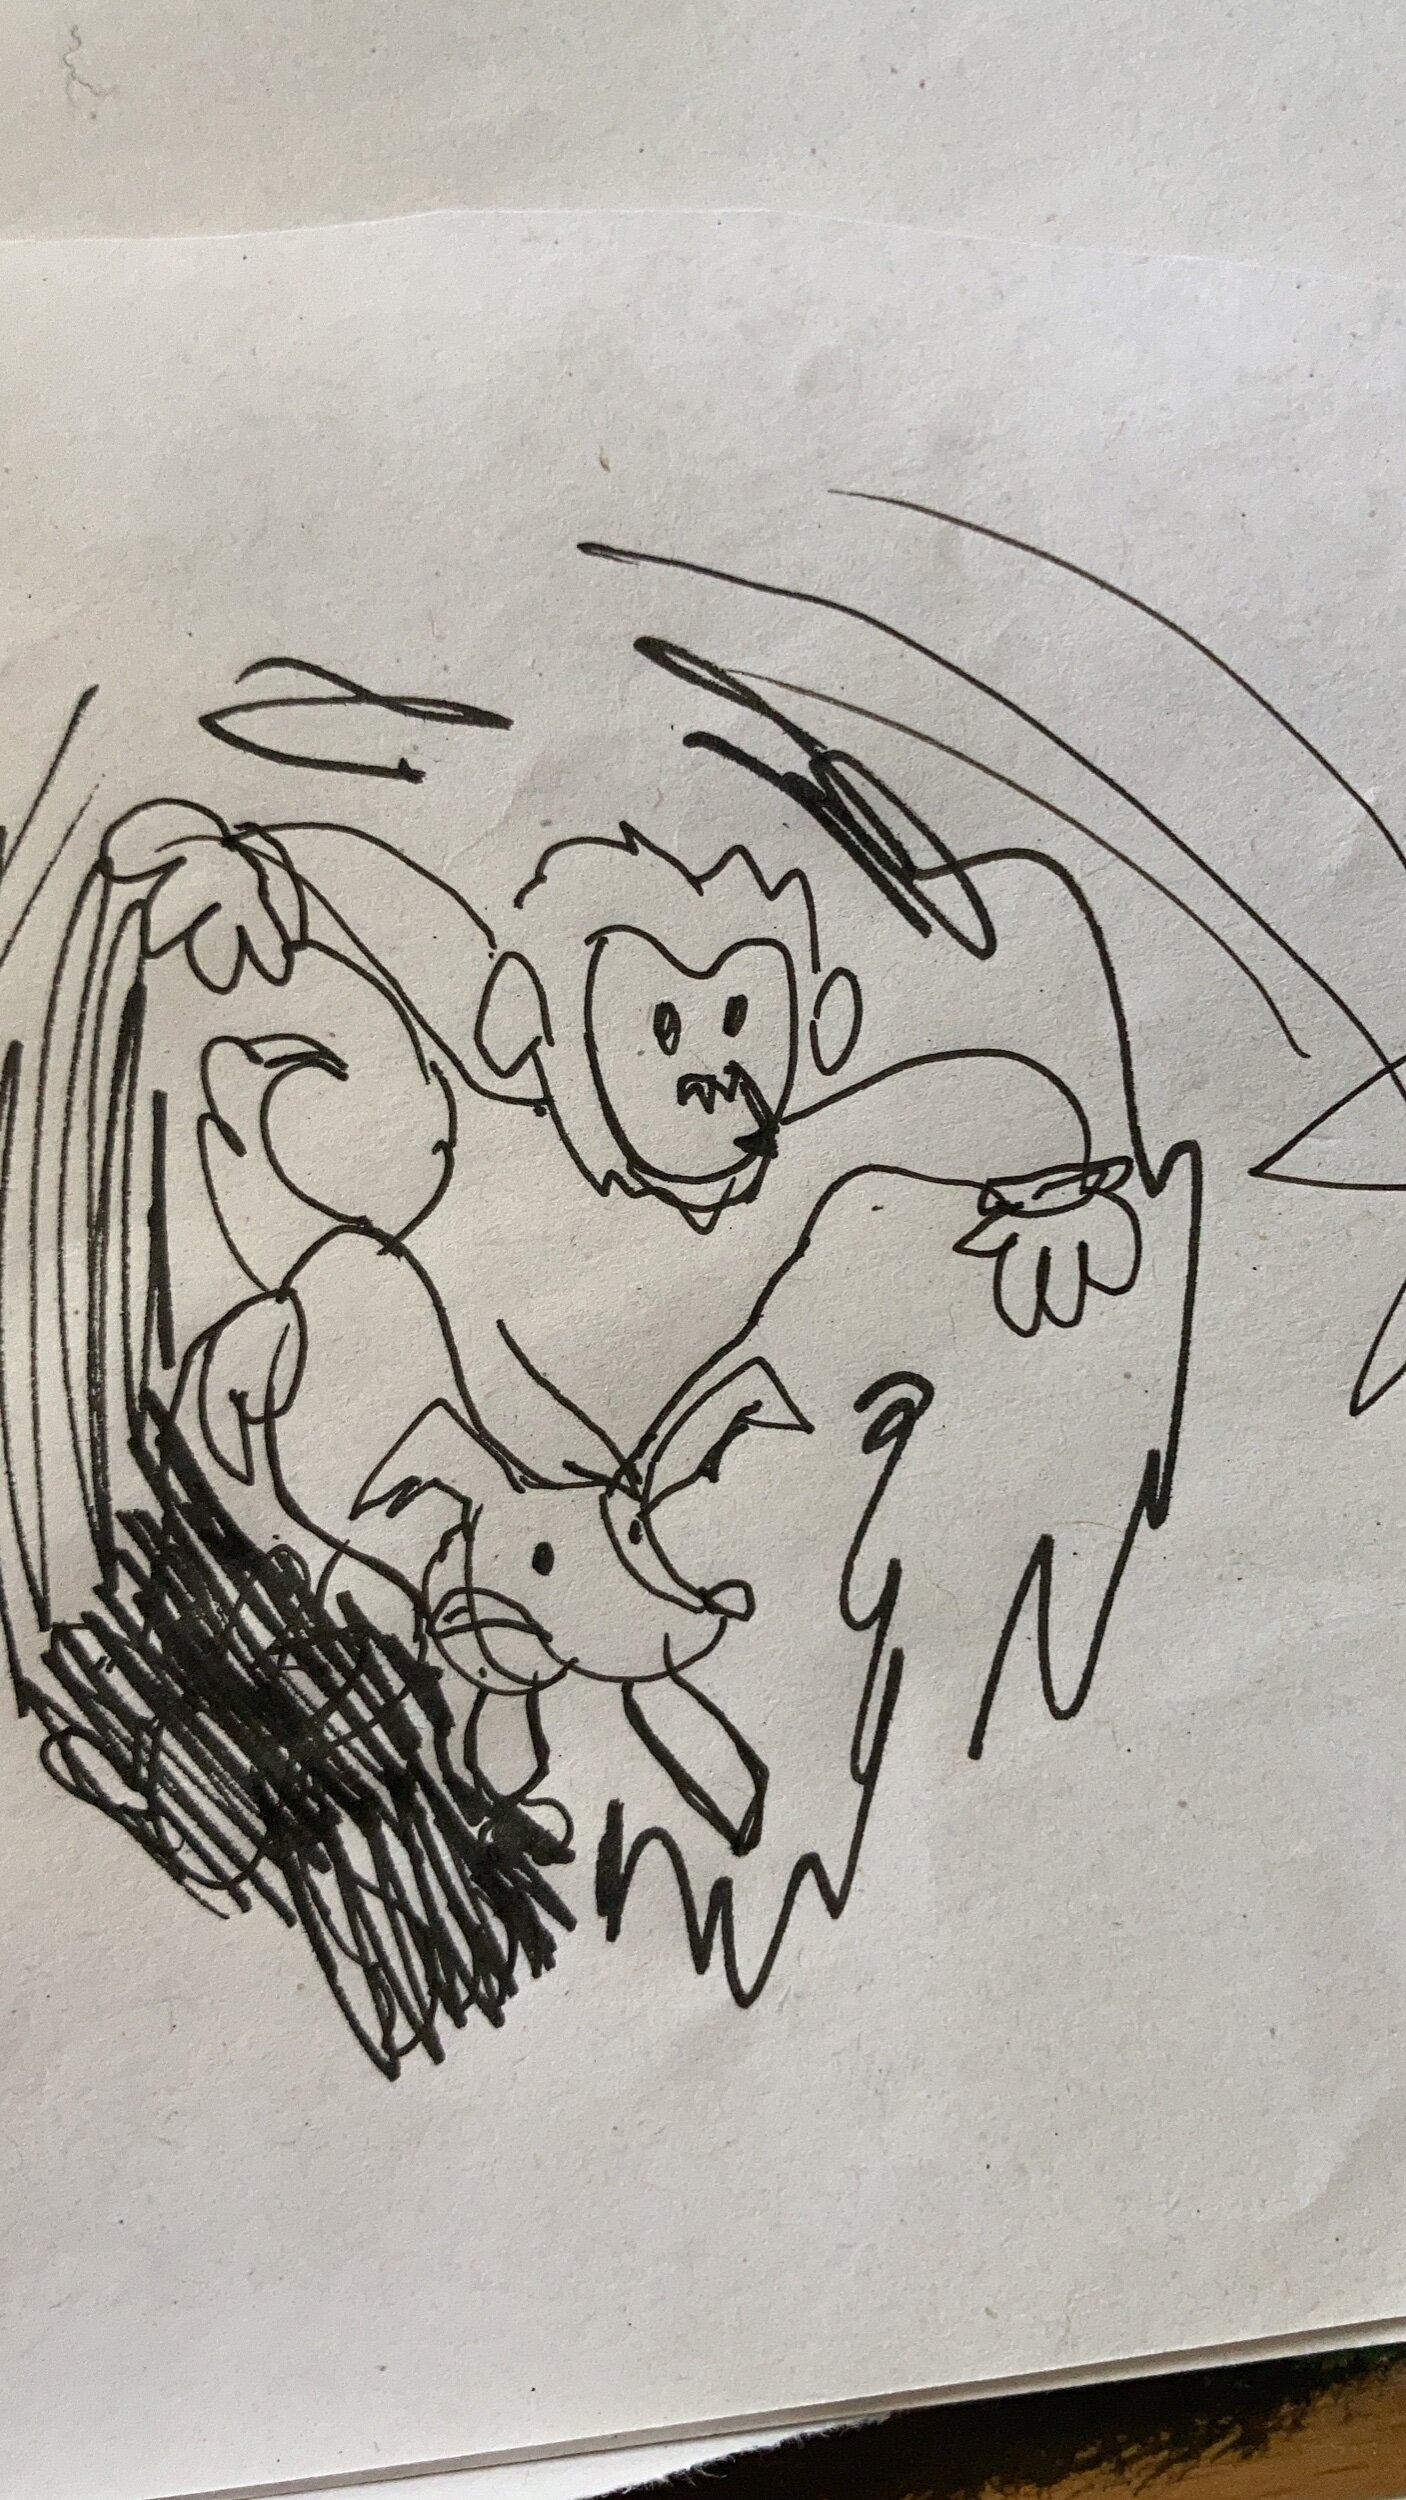
(I also drew this cute little sketch. Maybe I’ll turn it into a big paper cut one day.0
Next I’ll ink the drawing which helps to further define and smooth out the shapes and lines that I be cutting out.
I use an ink pen with a small nib that helps me make smooth confident lines. It’s only purpose is to ink out paper cut sketches. This is sometimes a no turning back stage as I don’t make a copy of my original drawing. This requires a lot of my focus to get right!

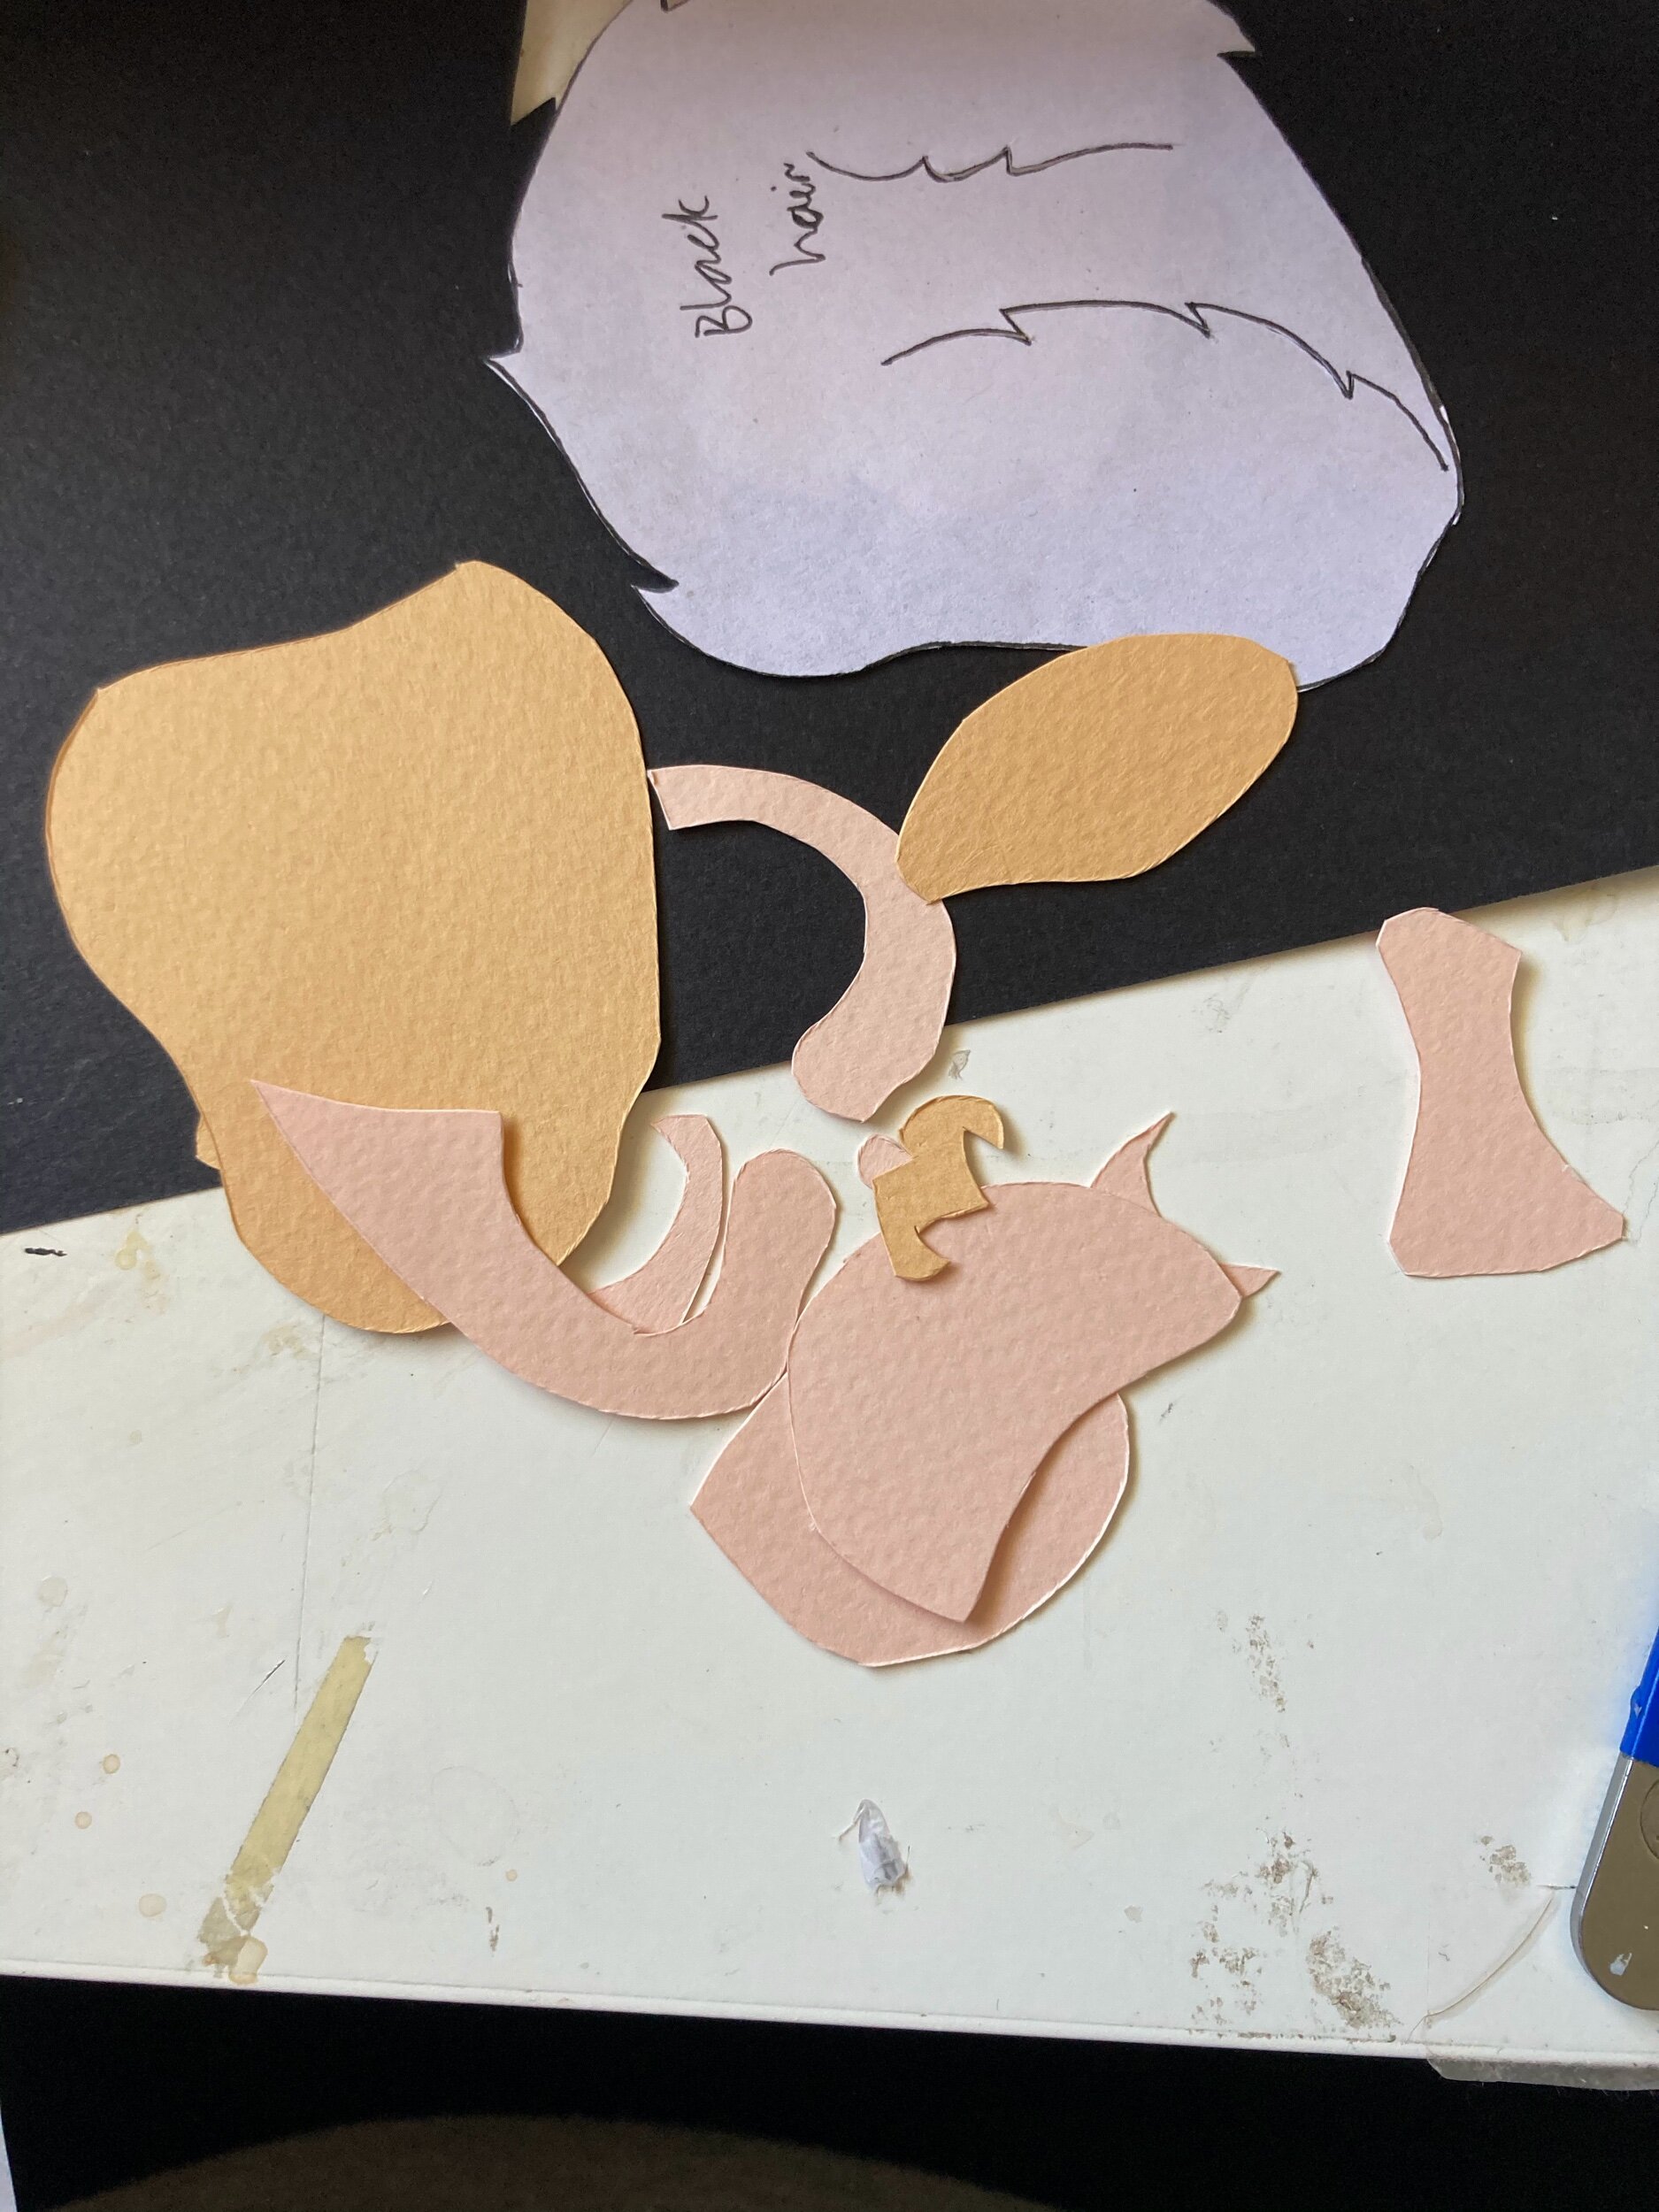
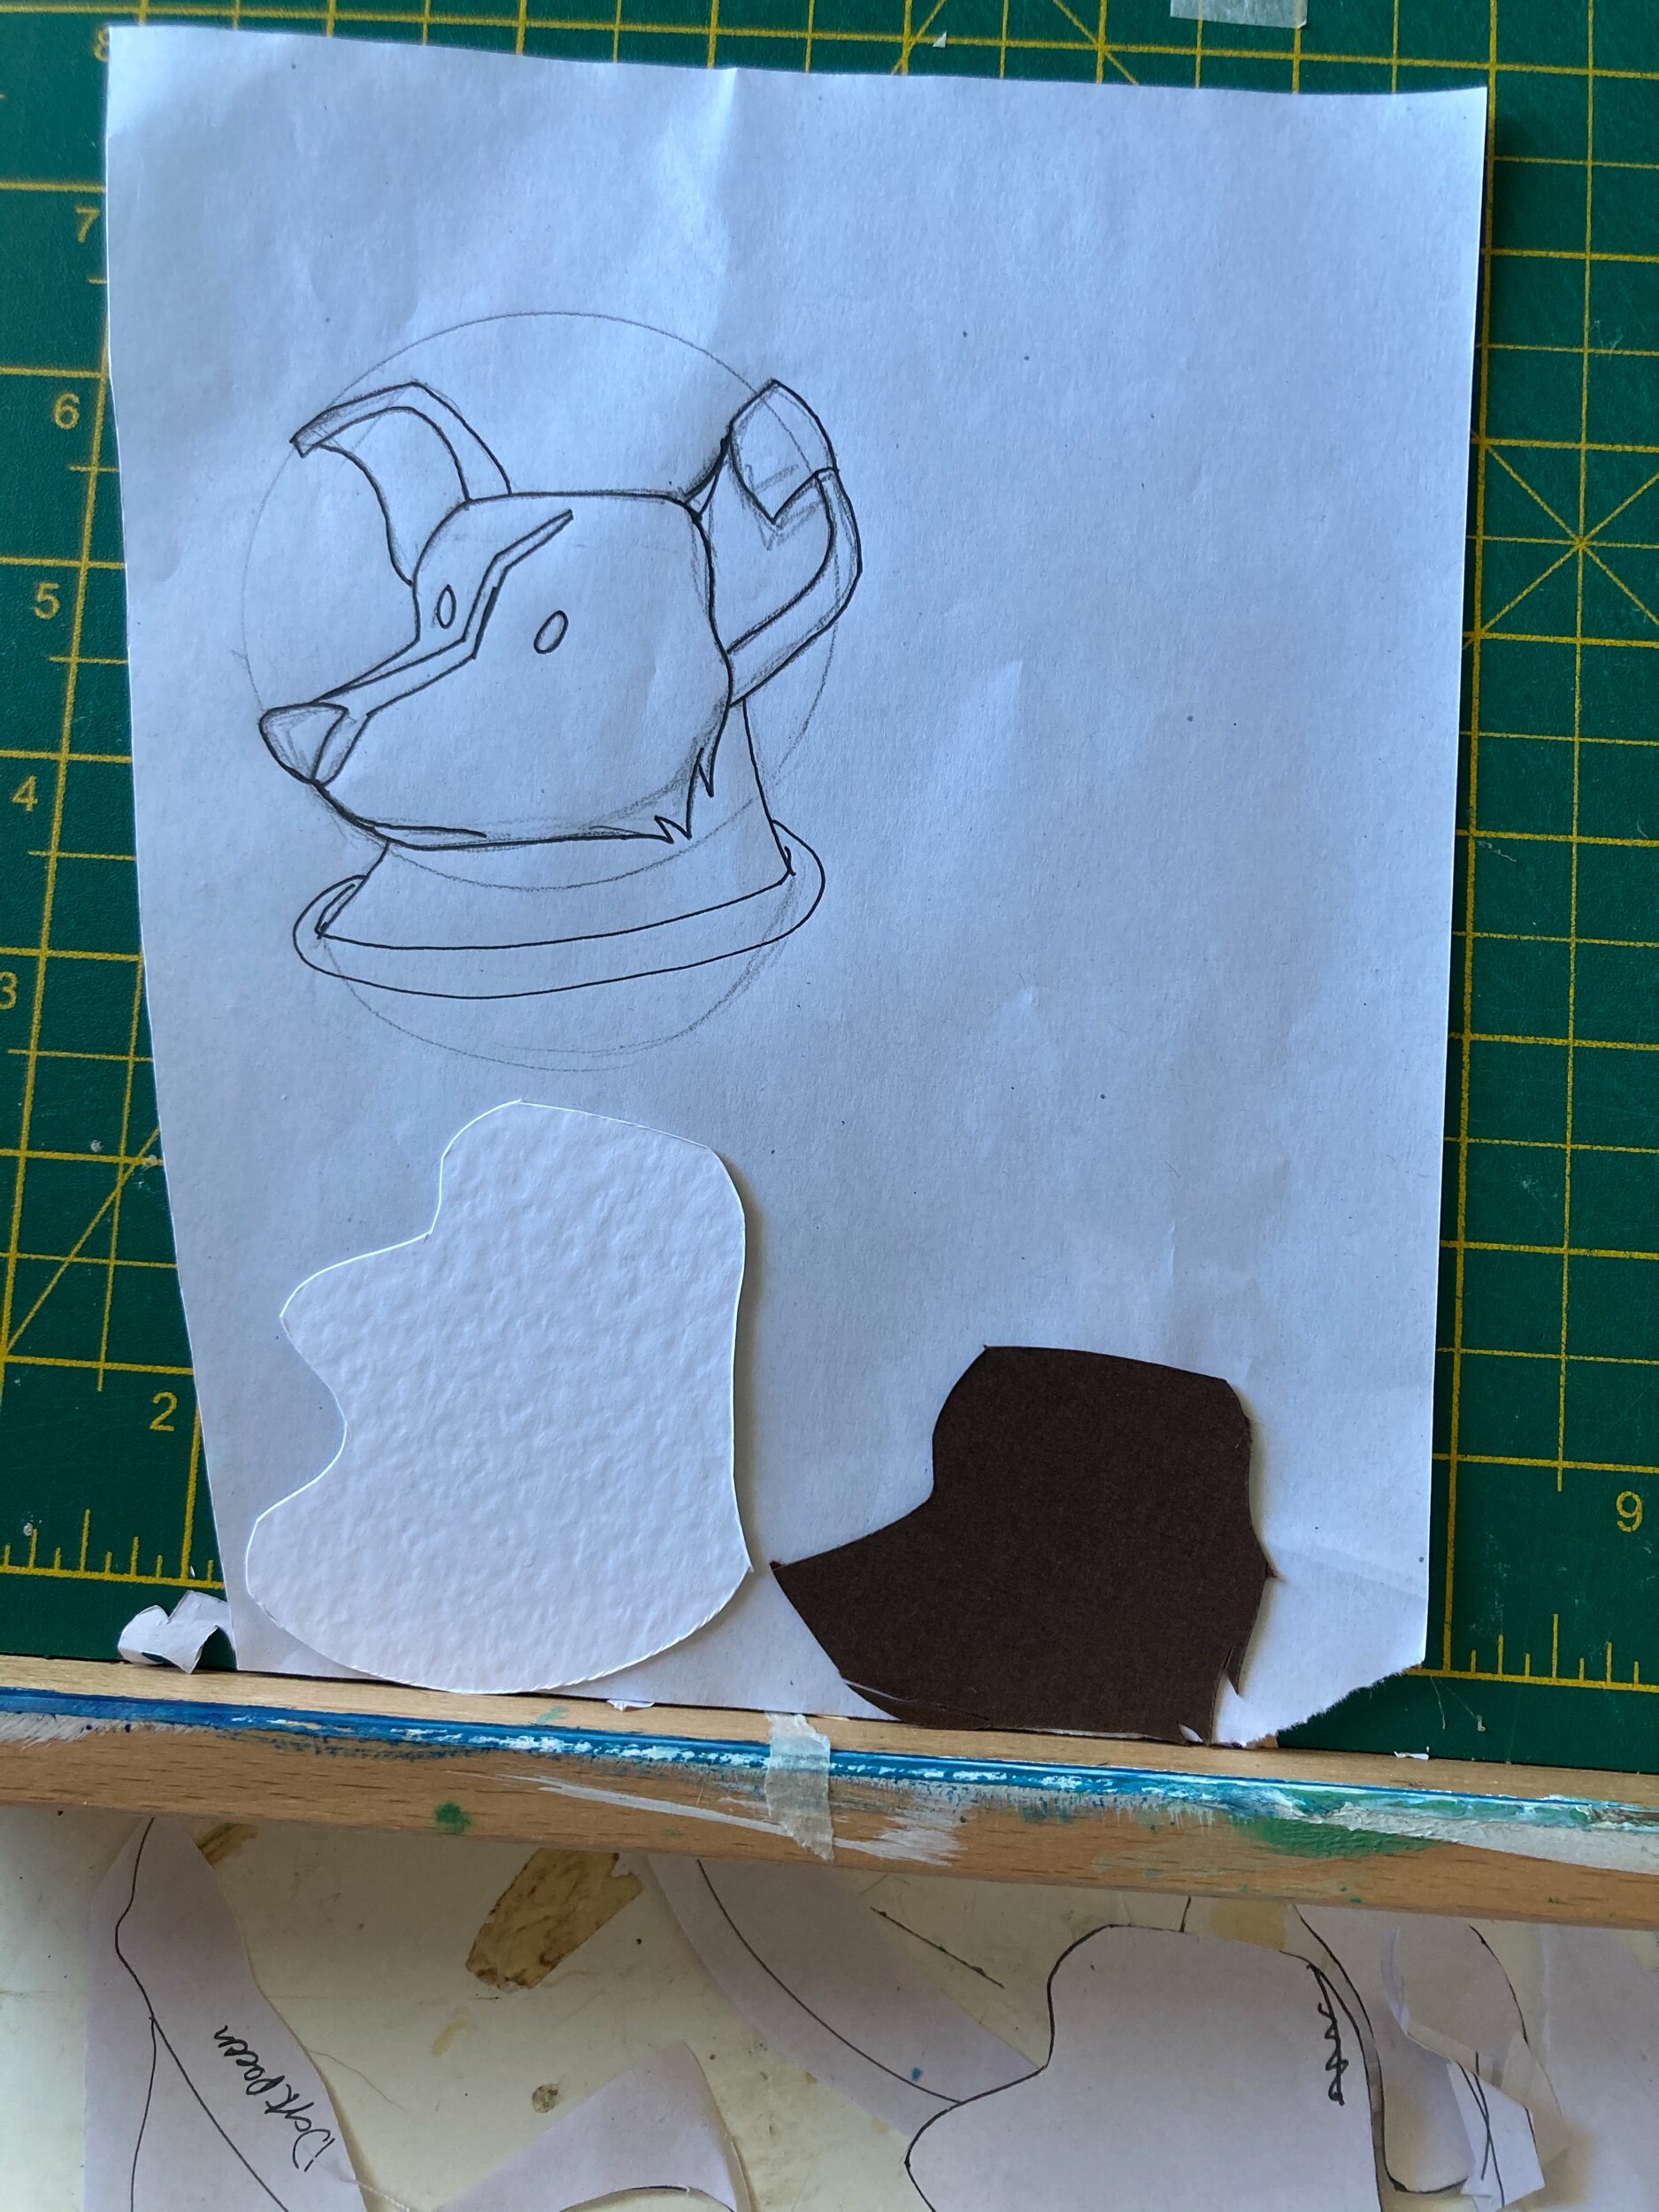
Next I will take a fresh piece of paper and trace over my ink drawing. I will break the drawing into the different layers as I go. I use a light box to make this a lot easier (it was a Christmas present I didn’t use for years but its gotten a lot of use in the last year!)
This is another point that I will think about colour and how I will use different tones or colour to make facial features more prominent or highlighted. I will probably go and raid my paper/card collection and finalise the colours I will be using. I try to group these shapes into their colours to make it easier for me to remember. Quite quickly the shapes lose all meaning if they aren’t as obvious as a nose so it really helps to also associate a shape with the colour. I sometimes change my mind!
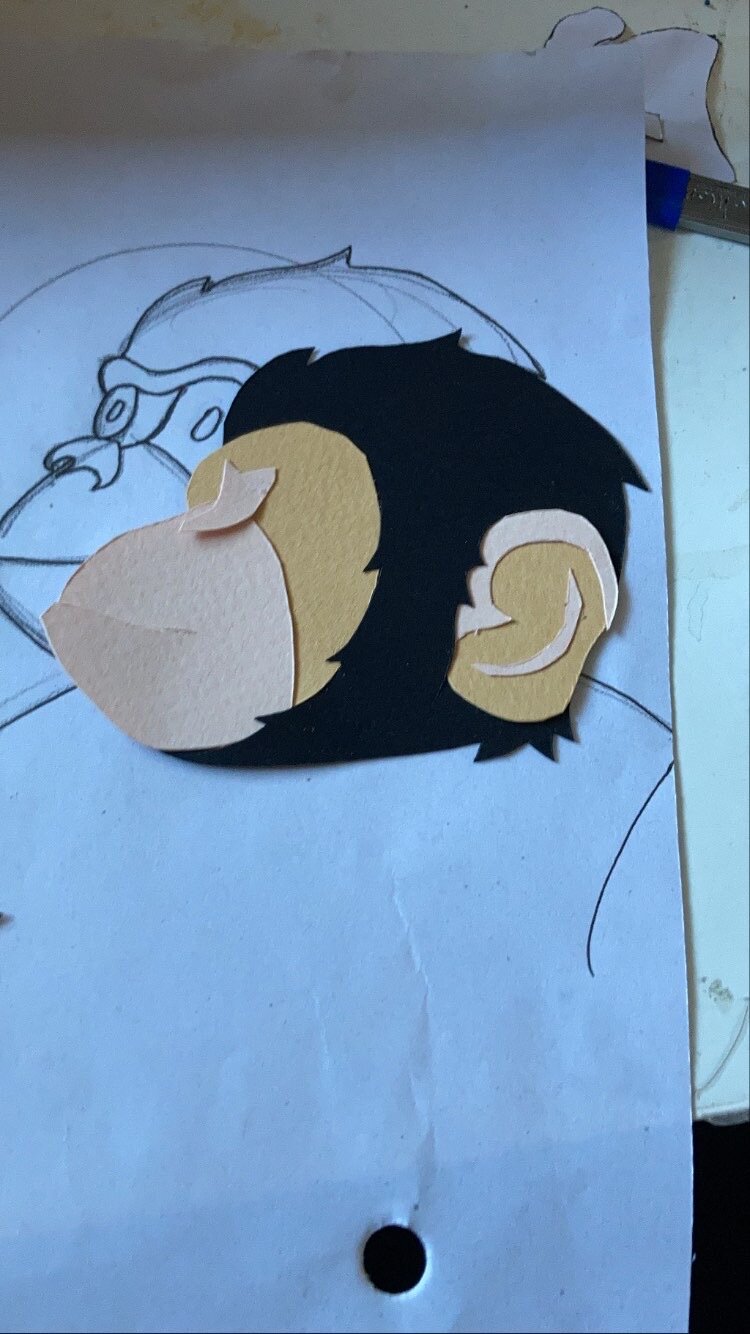
I also tend to extend the shapes if they will be layered under other shapes so theres something to glue onto. I usually trace out the shape of the whole piece too so I have a solid bottom-most layer to glue everything onto.
I don’t tend to trace of the eyes/pupils. I can usually freehand these (as they are such a simple shape) after I stick all the other layers together.

Then I’ll cut out the shapes, making sure they are still grouped by colour. If I’ve left a lot of white paper in between the traced lines, I’ll cut around them out so I don’t end up wasting card.

The happy dog paper clips are essential
Next I’ll take my coloured card and tape down the inked traced lines with masking tape. I like to cut the masking tape into thinner strips so I can tape my inked drawings closer together. I then use a scalpel knife to cut along the traced lines. This is probably my favourite part. I have a kitchen knife sharperner handy to keep the blade… well sharp.
I’m sorry I don’t have a photo of this. I must have got too excited.
I’ll keep the cut out card somewhere safe and to hand and hope I don’t accidentally push it off the table

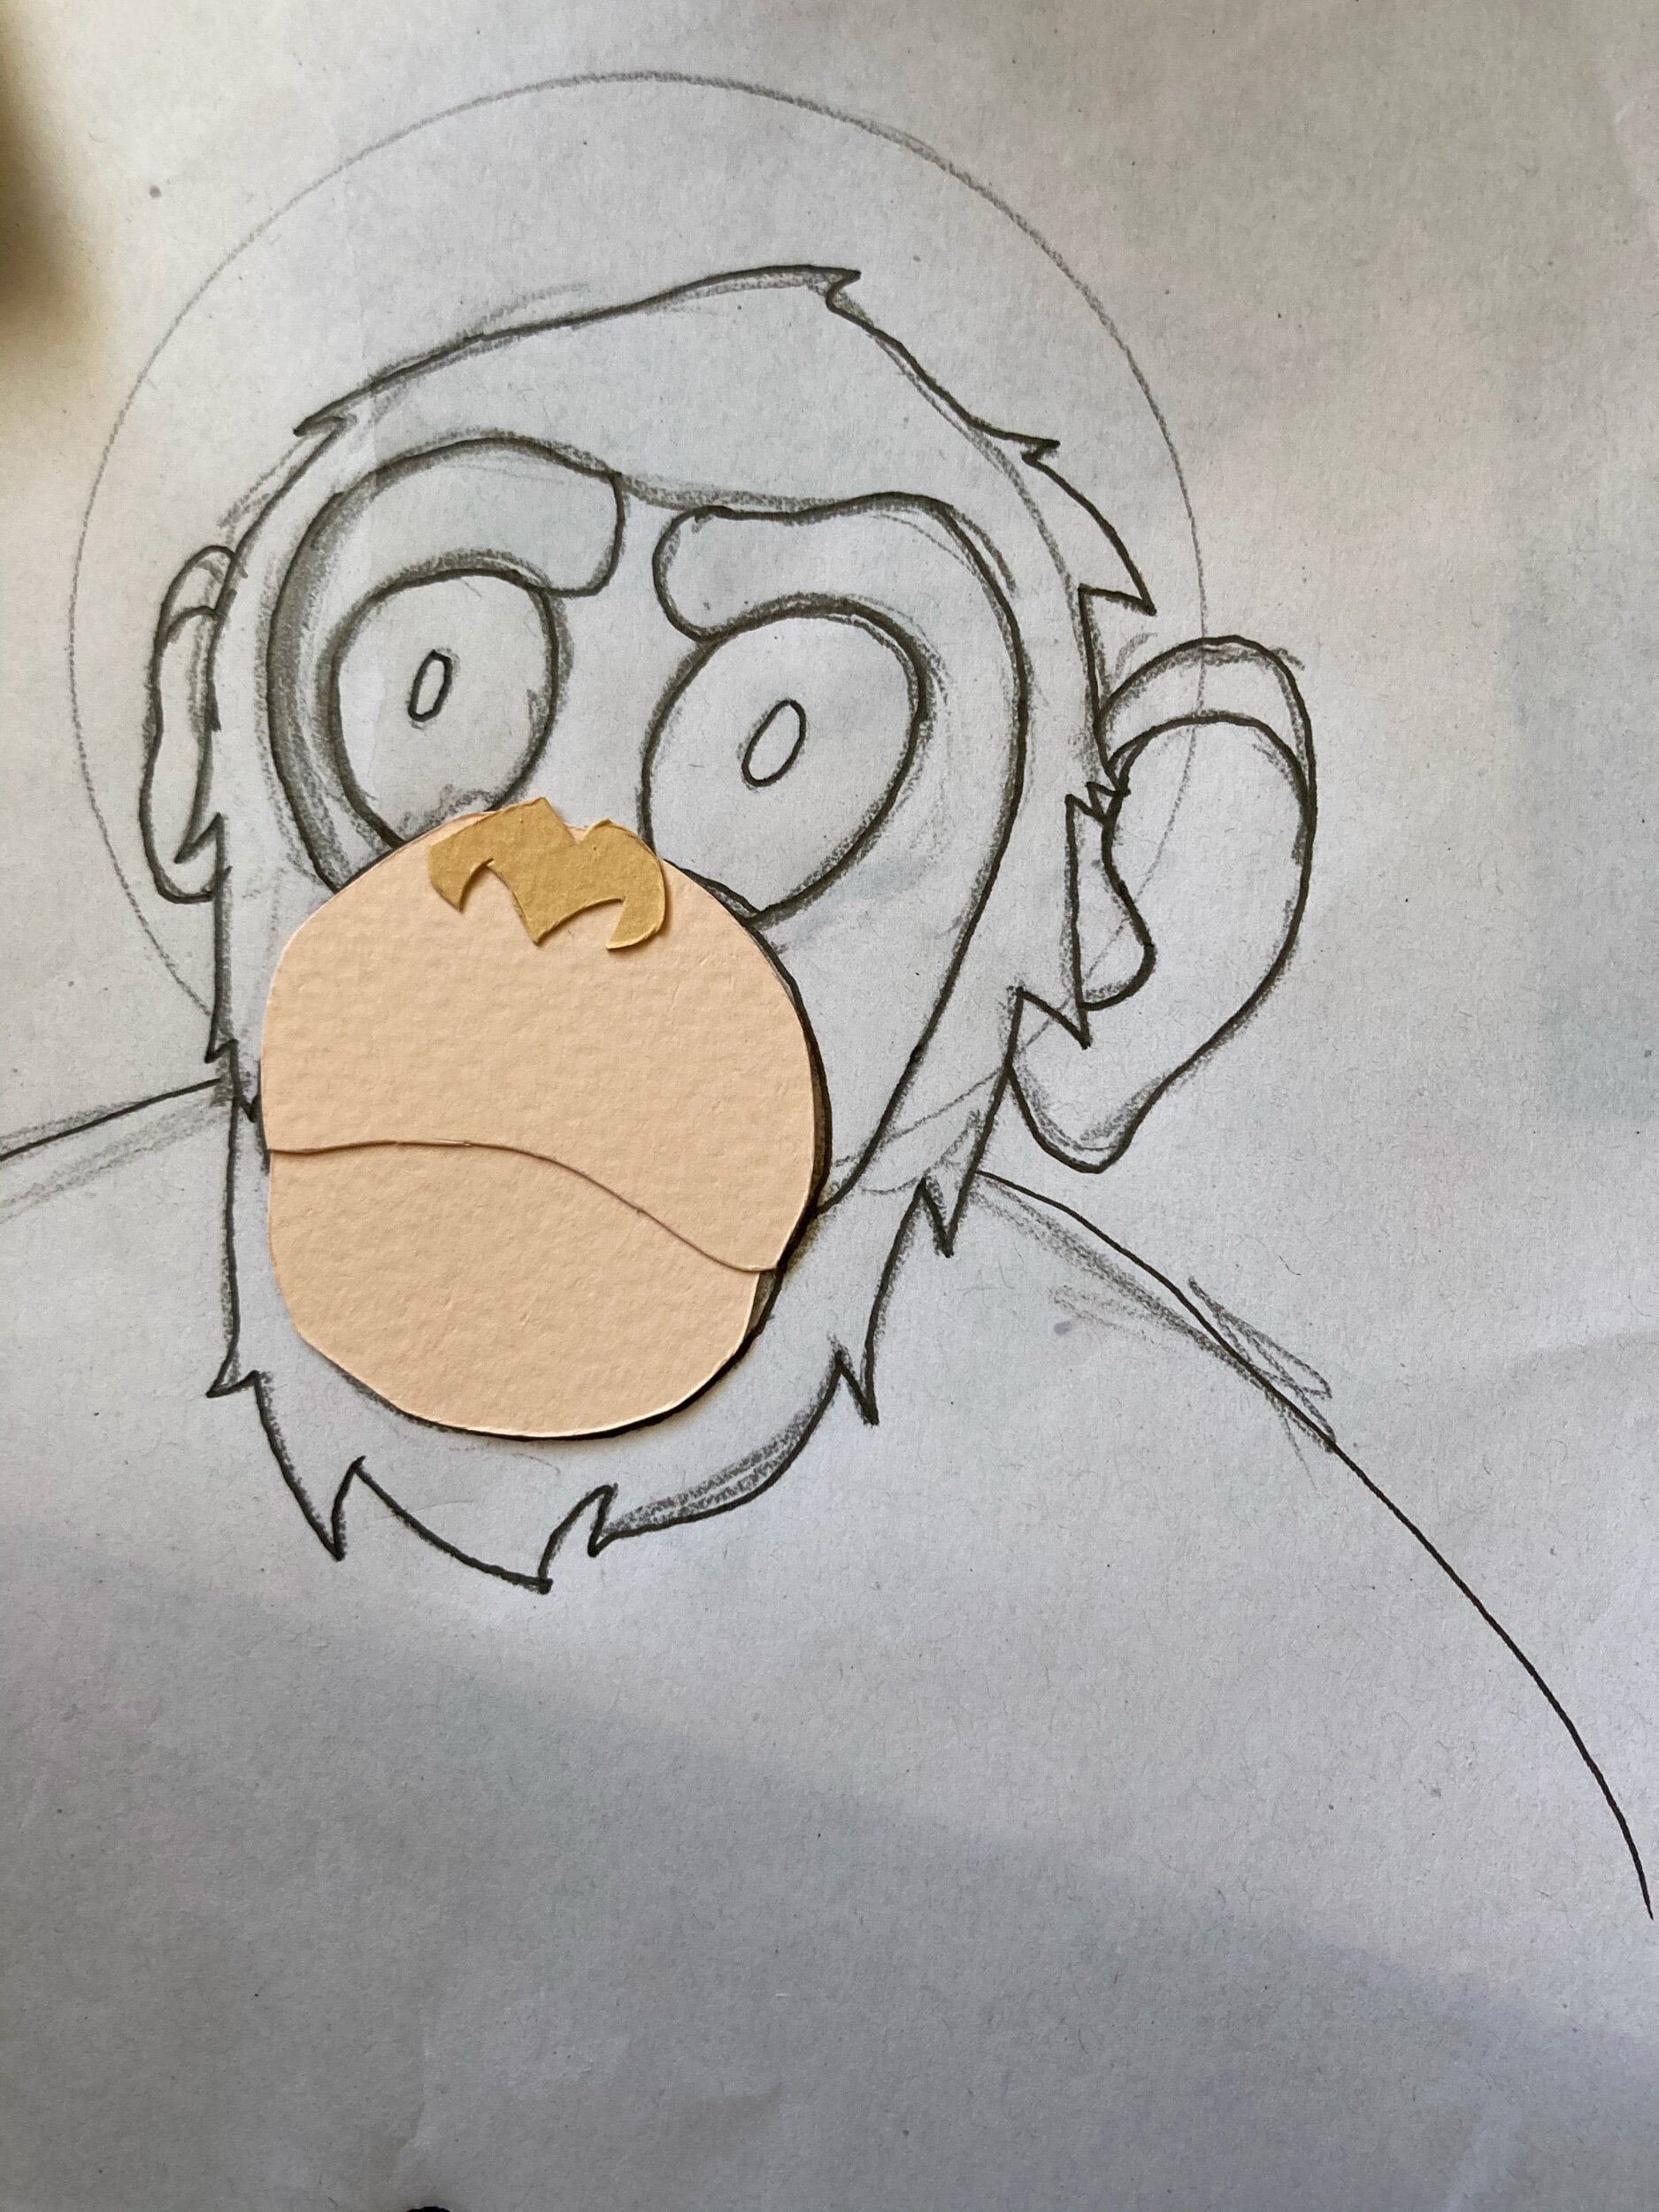
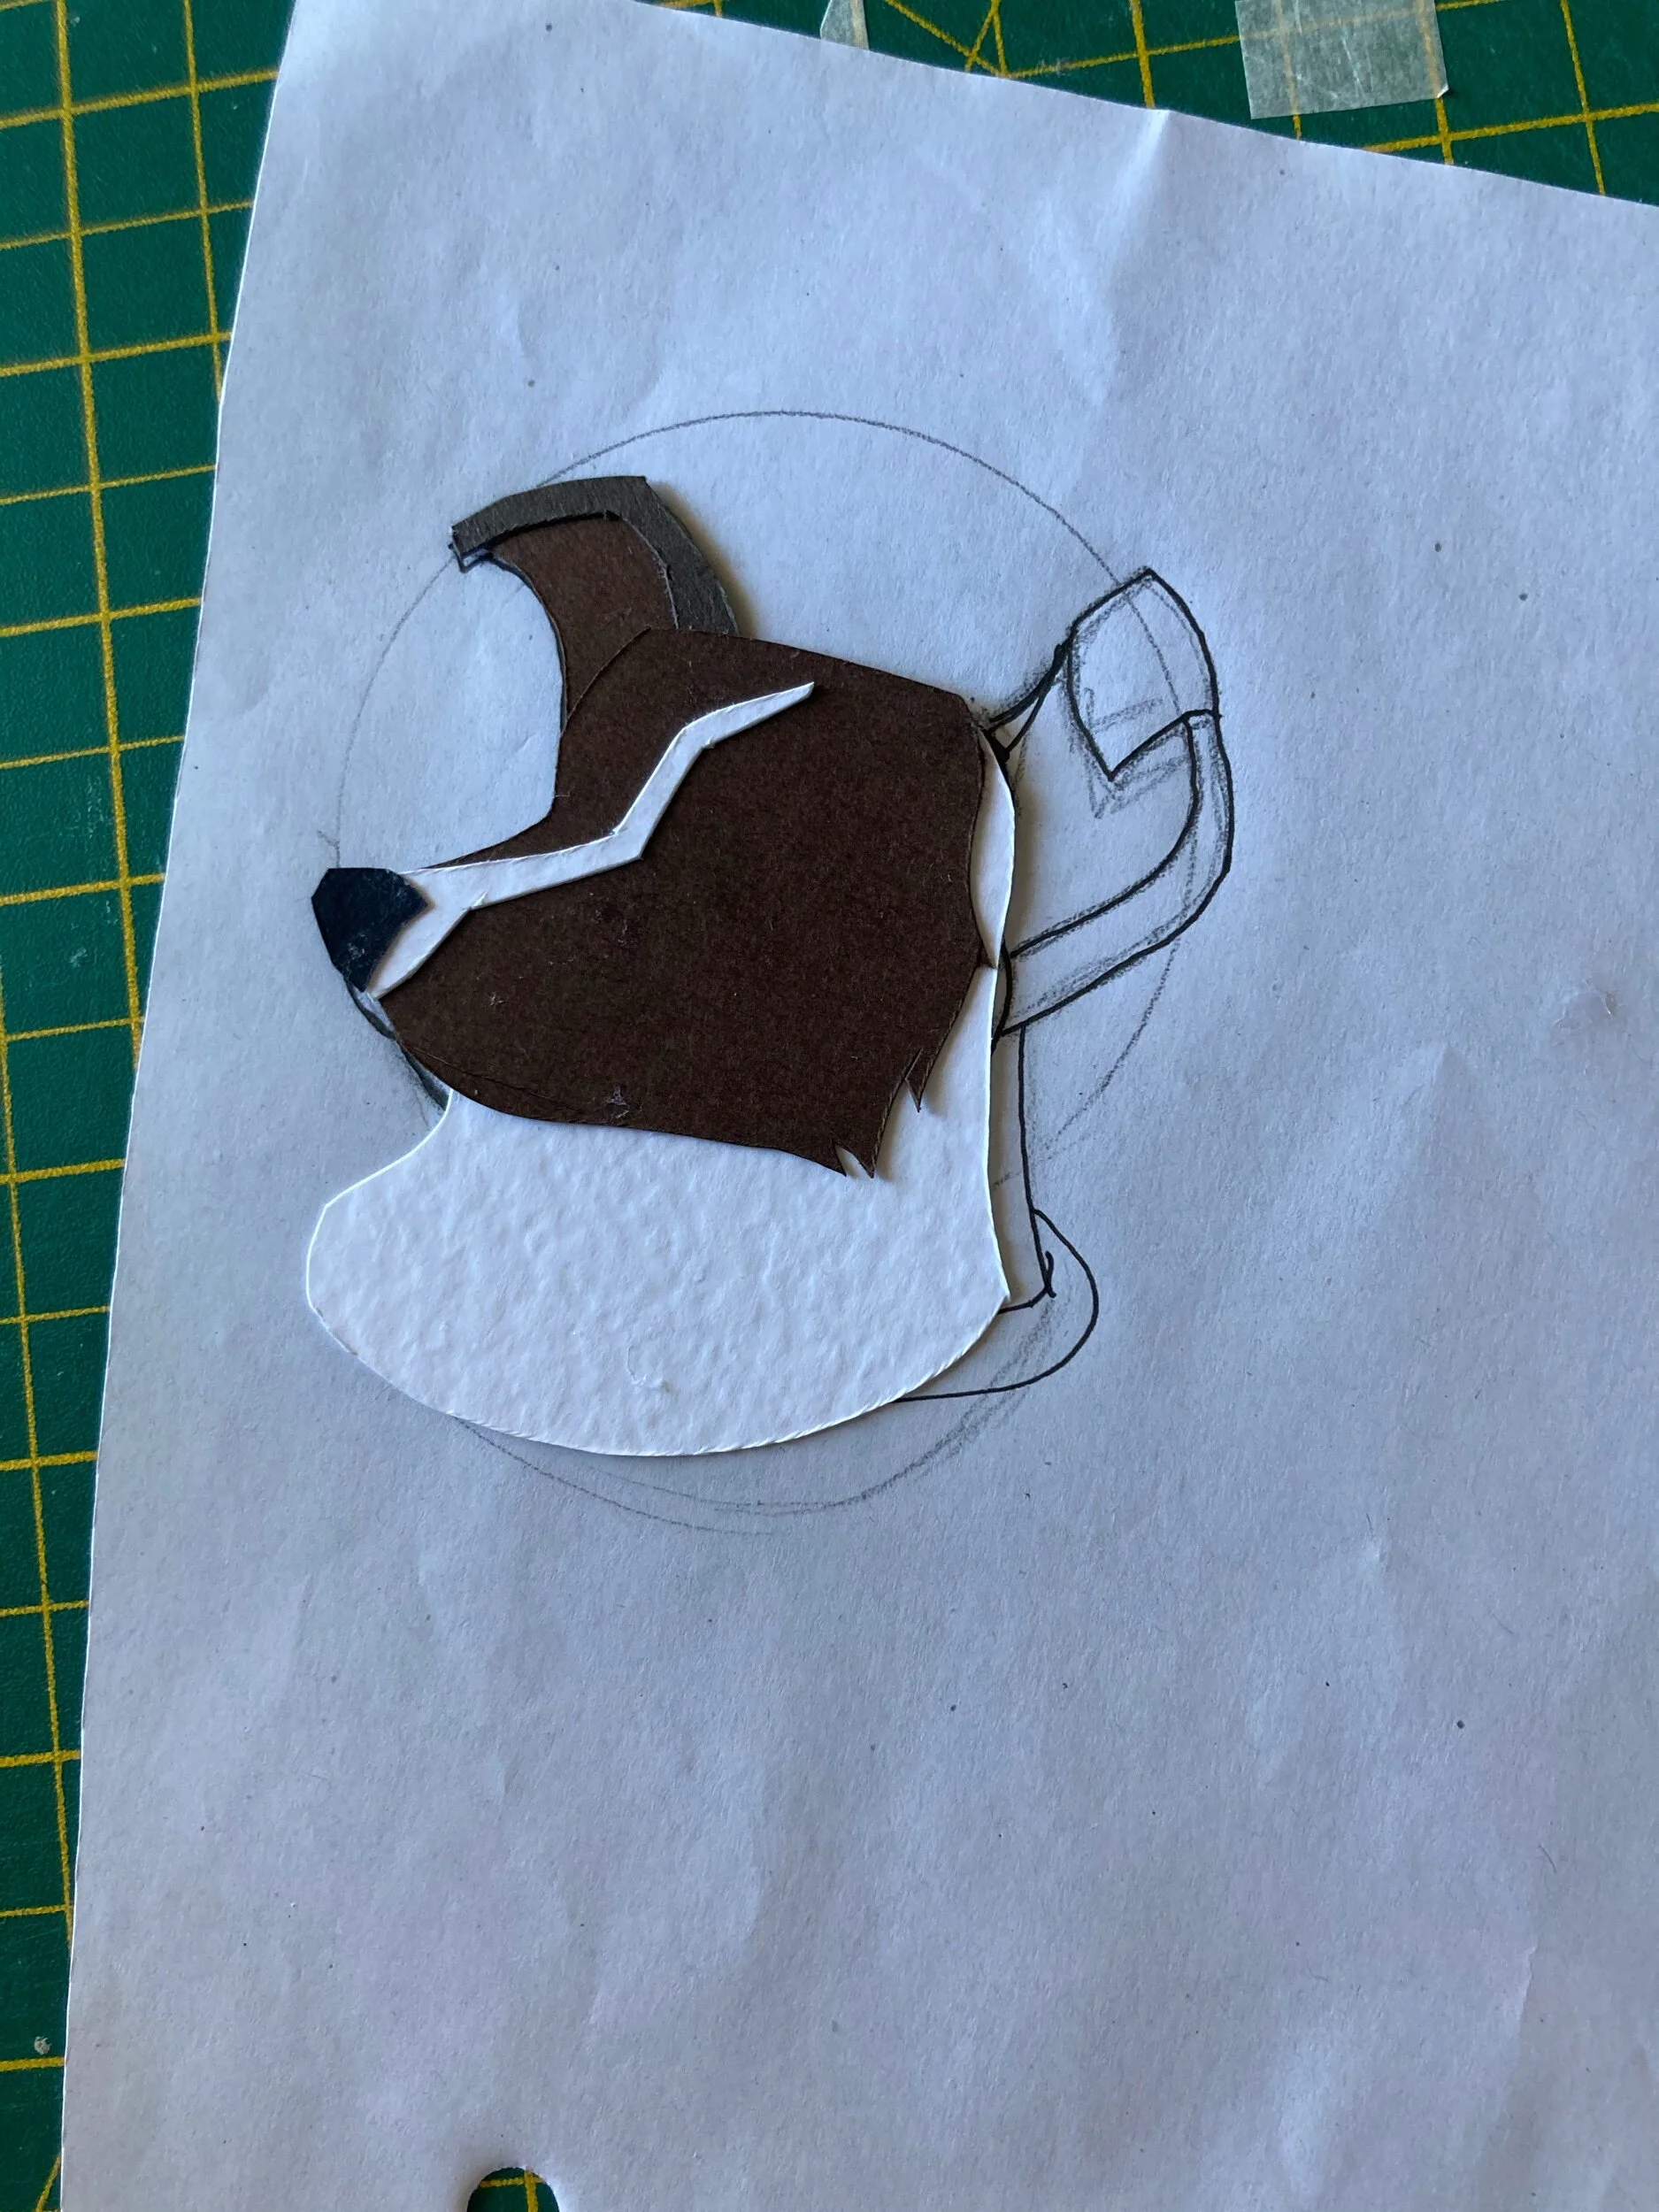
Once I have all the layers cut out. It’s time to stick them together.
I usually grab my original sketch to help figure out how the layers need to overlap. I will place my layers on top of the sketch and line them up. Sometimes this is a little tricky, especially if bottom layers obscure the detail below it. Sometimes it’s about judging it by eye. Sometimes I’ve done a good enough job figuring out the layers in the first place that it all just comes together. But that takes practice.
I usually need to do the layers in sections, whether that is starting with the head and shoulders, or the muzzle and facial features before sticking those all together. Sometimes through tracing and cutting, the shape I end up with is a little different from the original sketch but it’s usually close enough that only I would notice.
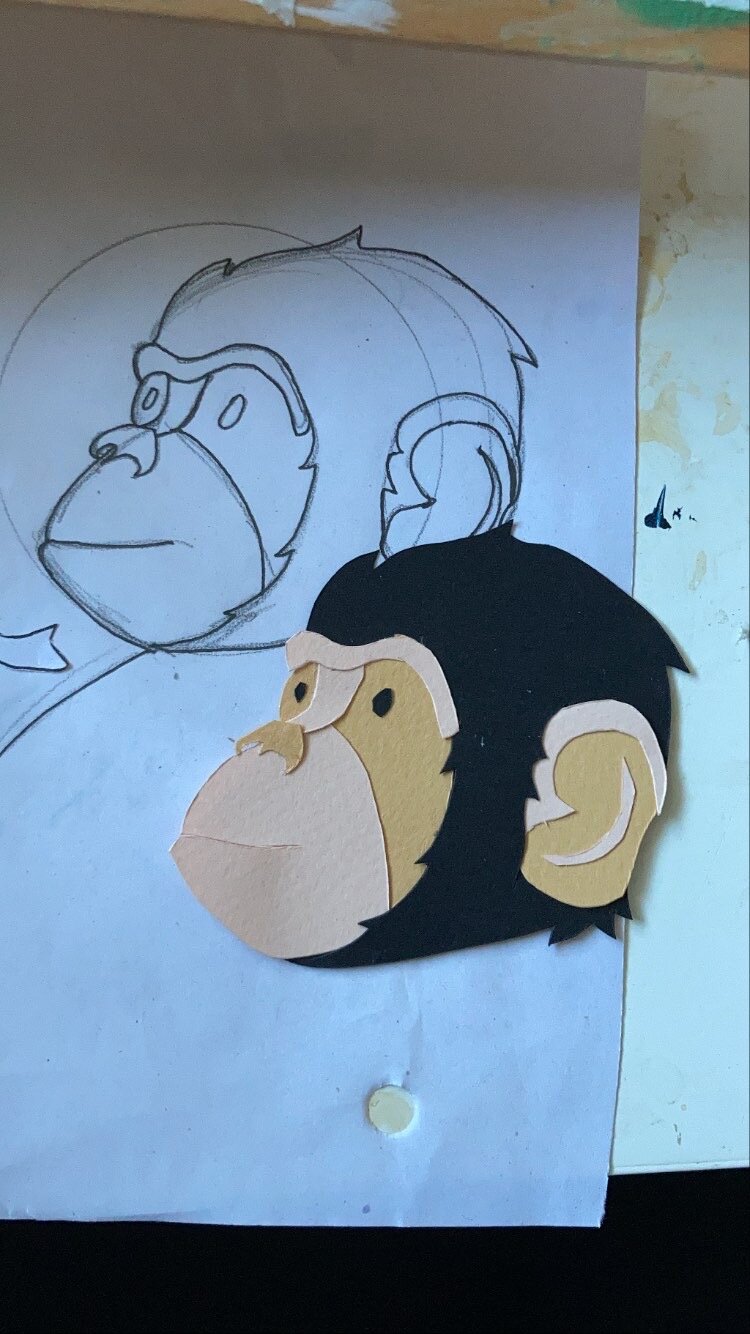
I either use glue stick (Pritt stick is the best I’ve found and tends to keep things actually stuck. It’s pricey but it works) to stick things flat. You also get a bit of time to reposition things, although this can cause the layers below to get a bit grimy. I also use 3D adhesive foam pads from if I want to separate layers and give the picture a bit of depth. I’ve been experimenting with using high tac liquid glue to also are sure things really stick together.
Once everything is stuck down (and this can be pretty fiddly) I’ll freehand the eyes and stick them down.
And there we go, that’s usually all it takes :)
I hope that can be helpful to anyone who wants to give it ago or want to find their own style/process in making paper cuts.